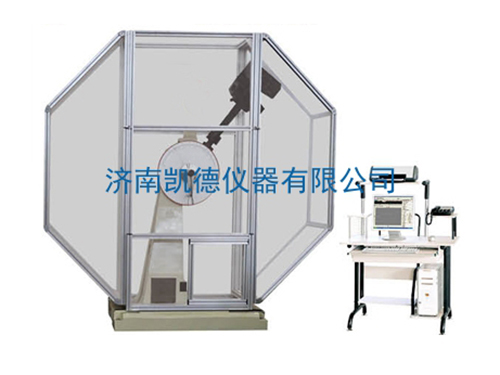
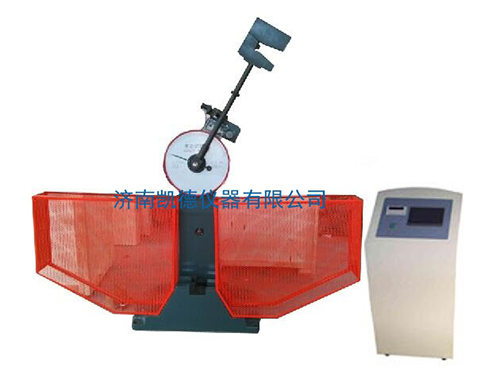
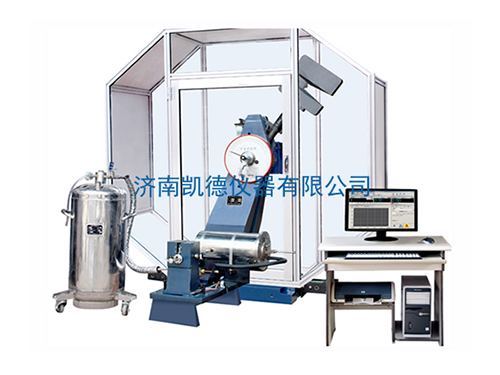
1. Features of JBW- Z 300C /Z500C microcomputer controlled pendulum type automatic impact testing machine
1. Introduction: JBW- Z 300C /Z500C microcomputer controlled pendulum-type automatic impact testing machine is suitable for mechanical metallurgy, aerospace, universities, research institutes and other fields to measure the impact toughness value of metal materials and metal materials Impact resistance under dynamic load.
2, according to the standard : GB / T3038-2002 «pendulum impact testing machine test» , GB / T229-2007 > , JJG145- 2007 "pendulum impact testing machine test procedures " .
2. Main features of JBW- Z 300C /Z500C microcomputer controlled pendulum type automatic impact testing machine
1. Use German Siemens PLC as the lower computer control, brand computer as the upper computer control, the upper computer program uses VB programming, RS232 communication mode, complete the data exchange and instruction transmission between the upper and lower computers, and make full use of the powerful functions of the PC for data processing , Report processing, etc. The high-precision rotary encoder of Nemitron is used to obtain the real-time position of the pendulum and obtain the impact absorption energy. It has the characteristics of system reliability, stability, and accurate data.
2. This machine is composed of a microcomputer and an industrial PLC programmable controller up and down two-level control system. The upper computer mainly completes the fully automated control, data processing, data management, and data printing of the test process, and the lower computer completes according to the instructions of the upper computer The whole process of taking the pendulum, impacting, automatically raising the pendulum, and then impacting multiple tests. After impacting the sample, the PLC programmable controller can transmit the collected test data such as the impact absorption energy to the microcomputer through the RS-232 interface. The test software can automatically save the test data in the database and import the test report to In the test report template (Excel format), the test report can be consulted and printed out at any time.
3. Advanced control principle
1) This machine adopts the PLC programmable controller produced by German Siemens to realize the fully automatic control of pendulum fetching, impact, automatic pendulum swing, and re-impact multiple tests during impact test. Data processing and data printing are possible. Features.
2) Test data can be automatically obtained after impacting the sample. Use Siemens PLC (or use high-precision PCI bus control card) to collect data, control the pendulum movement, completely avoid the interference of the single-chip control system, and ensure that every data collected is absolutely correct, and every action is controlled accurately . Prevent damage to the equipment due to incorrect actions caused by inaccurate control caused by interference (especially damage to the jaw clutch).
3) It has the advantages of simple operation, high reliability, strong anti-interference ability, versatility, adaptability, strong expansibility, small maintenance workload, and high work efficiency. It is better to demonstrate its superiority in steel manufacturers, machinery factories, scientific research institutions and universities that do continuous impact tests.
4) The data acquisition system has high resolution. The angular resolution is 0.1 degrees, and the accuracy is about 10 times higher than that of the dial pendulum, which ensures the measurement accuracy .
4. The base and column of the main frame are processed by casting, the rigidity of the main frame is greatly improved, and the stability of the test is greatly improved; the pendulum shaft is supported by simply supported beams, and the radial load distribution of the bearing is reasonable, which greatly reduces the energy brought by bearing friction. The impact absorption energy of the empty pendulum is less than 0.3%; the single standard geared motor is used to lift the hammer, which greatly reduces the complexity of the hammer lifting system and avoids the problems of the assembly and use of the previous deceleration link; the suspension device adopts spring buffer, sound Small and stable.
5. The square pendulum body design of the pendulum adopts 3D software design and analysis to ensure the accuracy of the strike center and the precise moment of the pendulum, which fundamentally ensures the accuracy of the detection data.
6. Built-in national standard energy loss correction program, so that every test result is corrected in accordance with the standard requirements, and the test result is more accurate. And it has equipment calibration function.
7. The main electrical components of the control circuit are produced by well-known foreign or Sino-foreign joint ventures to ensure the reliability and stability of the equipment.
8. This machine is not only designed with a safety protection pin protection device in the control circuit, but also equipped with a fully enclosed protective cover to completely protect personal safety, safer and more reliable to use, and beautiful in appearance.
9. The whole machine adopts high-grade automobile special paint and a well-designed color scheme. The whole equipment has an elegant appearance and is coordinated with the overall good working environment of the quality inspection department.
10. This machine is a fully automatic impact test, equipped with a pneumatic special sample feeding device to automatically send the sample. The pneumatic end face positioning method is used to center the sample to ensure that after the sample completes the low temperature test, the time from the furnace to the impact does not exceed 4 seconds. Test accuracy and work efficiency. Pendulum fetching, hanging pendulum, sample delivery, positioning and impact are all automatically controlled by electrical appliances. After breaking the sample, the remaining energy is used to automatically raise the pendulum to prepare for the next impact test. Therefore, it is better to demonstrate its superiority in the laboratory that continuously conducts low-temperature impact tests and the metallurgical and machinery manufacturing plants that do a large number of low-temperature impact tests. Sex.
3. JBW- Z 300C / Z 500C microcomputer controlled pendulum type automatic impact testing machine main technical indicators:
Serial number |
Project Description |
Specifications |
|
JB W -300C |
JB W -500C |
||
1 |
Impact energy |
300J |
5 00J |
2 |
Pendulum moment |
160.7695N·m |
267.9492N·m |
3 |
Energy range of dial scale |
0-300J |
0-500J |
4 |
The division value of each division of the dial |
2J |
5J |
5 |
Computer display minimum resolution value |
0.1J |
0.1J |
6 |
Pendulum advance angle |
150° |
150° |
7 |
Distance from pendulum center to impact point (test center) |
800mm |
800mm |
8 |
Impact velocity |
5.4-5.58m/s |
5.4m/s |
9 |
Specimen support span |
40mm |
40mm |
10 |
Arc radius at the end of specimen support |
R1 ~1.5mm |
R1 ~1.5mm |
11 |
Inclination angle of support surface of specimen support |
0° |
0° |
12 |
Impact knife arc radius |
R2~2.5mm |
R2~2.5mm |
13 |
The angle between the two slopes of the impact knife |
30° |
30° |
14 |
Impact blade thickness |
16mm |
16mm |
15 |
Blade |
National standard |
National standard |
16 |
Specimen specifications |
10×10 (7.5 or 5) ×55mm |
10×10 (7.5 or 5) ×55mm |
17 |
Test machine weight |
≈ 5 00kg |
≈ 6 00kg |
18 |
External dimensions of testing machine |
2300×600×1400mm |
2300×630×2100mm |
19 |
Sample box capacity |
10 |
10 |
20 |
Digital display timer |
1 point to 999 points, resolution 1 point |
1 point to 999 points, resolution 1 point |
twenty one |
Feeding speed |
≤4S |
≤4S |
twenty two |
Test machine weight |
≈ 6 00kg |
≈ 7 00kg |
twenty three |
Power supply (three-phase four-wire system) |
50HZ,380V,370W | 50HZ, 380V, 550W |


